
Saving an Information Request Response as a QuickIR Response During a Supervisory Activity
Only the company lead can save an Information Request (IR) response as a QuickIR response during a Supervisory Activity.
Procedure
-
Navigate to your supervisory activity.

-
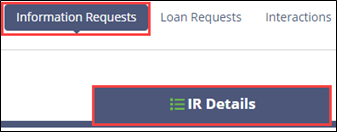
Click Information
Requests.

-
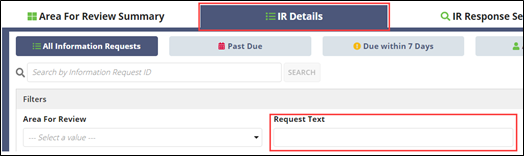
Click the IR Details tab.
-
Search through the full list of information requests and request text using the
IR Details tab.
Note: You can search for the desired information request by using keywords within the information request, response, or file name.Tip: After you have sent responses to the agency, the IR Response Search tab becomes available. You can use this to search through keywords, file names, and response text, including responses saved as QuickIR responses.
-
Click the SA IR ID hyperlink of the desired Information
Request.

-
Click Respond to Information Request.

- Optional:
Select the Save as QuickIR Response option.
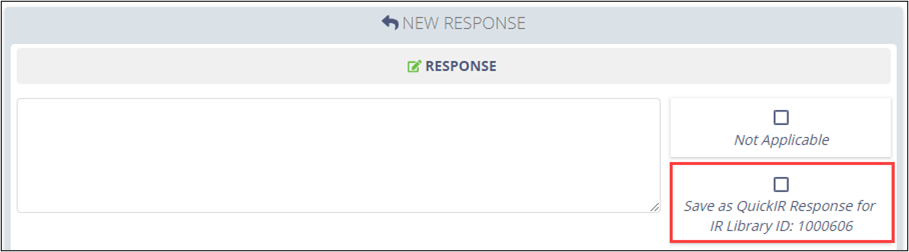 Note: Ensure that you refer to the Library ID in your IR response so that you can use this response from QuickIR on future supervisory activities. Do not refer to the IR ID in your IR response. The IR ID changes with each supervisory activity. The Library ID is the permanent unique identifier for an information request that remains the same across all supervisory activities.
 -
Provide your response and upload any associated documents. See Uploading Documents for details on uploading documents.
Tip: When providing responses to IRs via the Upload Documents section, it is recommended to type Please see attached documents in the Response text box.Note: You can select Not Applicable to indicate to the agency that information request does not apply. You cannot upload documents, include a file sharing link, or restrict view; however, you may still add a response or comments.
-
Select a desired expiration date.
- 6 months
- 1 year
- 2 years
Note: SES pre-determines expiration options. You cannot set a custom expiration time for a response. Expired responses can no longer be associated to IRs as part of an examination. -
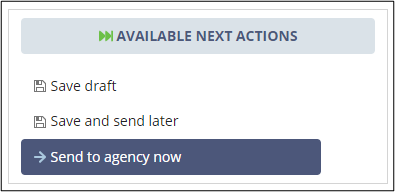
Select the appropriate Available Next Action.
Results
Your response is saved in QuickIR in the Response Added section.